1. Normalize the Subversion File System
Unlike Git, when you use Subversion, the management of branches and releases is done solely by folder naming convention. With Git, the handling of branches is an integral part of Git, whereas with Subversion, you can choose to follow the standard naming conventions or not. The standard convention for Subversion is as follows:

So the first step in the migration to Git, is to fully normalize your repository layout in Subversion to match the standard layout above.
For example, in our own SpiraTeam repository (that we migrated to Git), we had the following structure in Subversion:
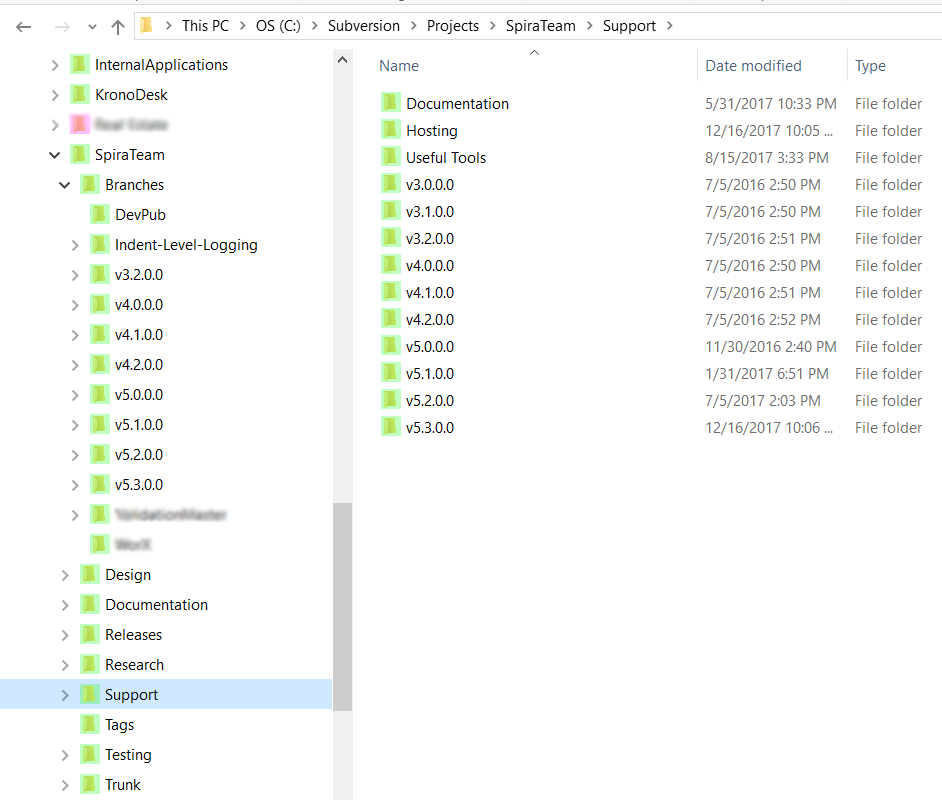
It was partly conforming to the standard layout already because we had a Trunk folder and we had Branches for the various versions. However, we also had a bunch of folders that were outside of this format (Design, Documentation, Releases, Research, Support, and Testing). We had to first use SVN-Rename commands to modify the layout, so that all of these folders were moved under Trunk. In addition, some of these folders had their own subfolders that matched specific versions. We had to move those folders under the appropriate Branch.
So for example, we moved:
- Support/v4.0.0.0 ---> Branches/v4.0.0.0/Support
- Support/v5.4.0.0 ----> Trunk/Support
- Testing/v4.0 ---> Branches/v4.0.0.0/Testing
Once that was done, we had the following standard Subversion repository in place:
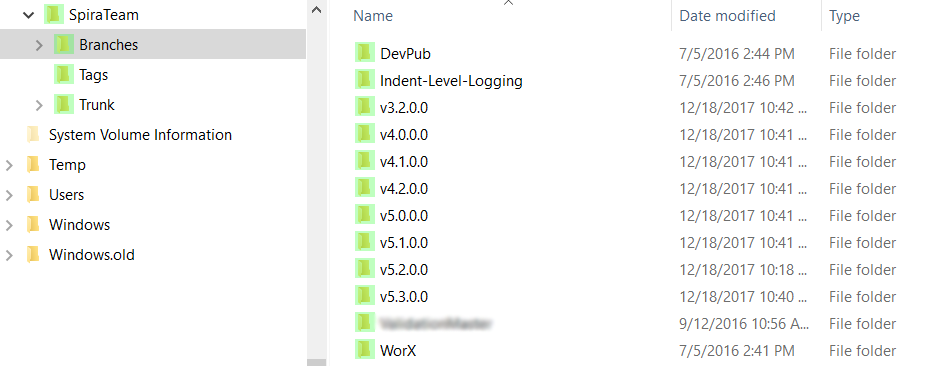
In the examples above we used TortoiseSVN to do the renames and to display the folder structure. You can use any SVN client of your choice.
2. Clone the Git Repository from Subversion
Once you have the SVN repository in the correct layout, the next thing to do is use the Git Clone option to clone from an SVN repository. The screenshot example below is shown using TortoiseGit to perform the Git Clone:

This can also be done using Git on the command-line:
git svn clone [SVN repo URL] --no-metadata -A authors-transform.txt --stdlayout ~/temp
(the authors-transform.txt file is used if you want to change the login name of the committers from SVN to Git, see https://john.albin.net/git/convert-subversion-to-git)
The key is to specify the Trunk, Tags, and Branch folders being used (case sensitive) in your installation.
Once the clone is completed, you will have a new Git repository that is linked to the SVN repository (i.e. the SVN repository acts as the remote Git instance, with remote origin branches):
This means that the Git repository is still linked to the original SVN repository, and changes PUSHed to origin, will update SVN. This is not what we want in this case, we want to migrate from SVN to a completely separate Git environment. So there are a few more steps...
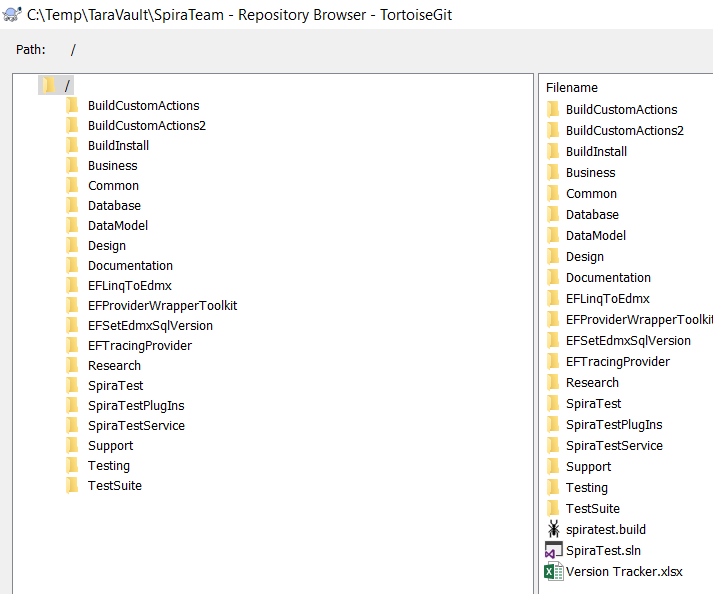
3. Checkout and Create Local Branches
If you examine the repository using the Repo browse (e.g. in TortoiseGit), you will see the following remote (origin) branches that link back to Subversion:
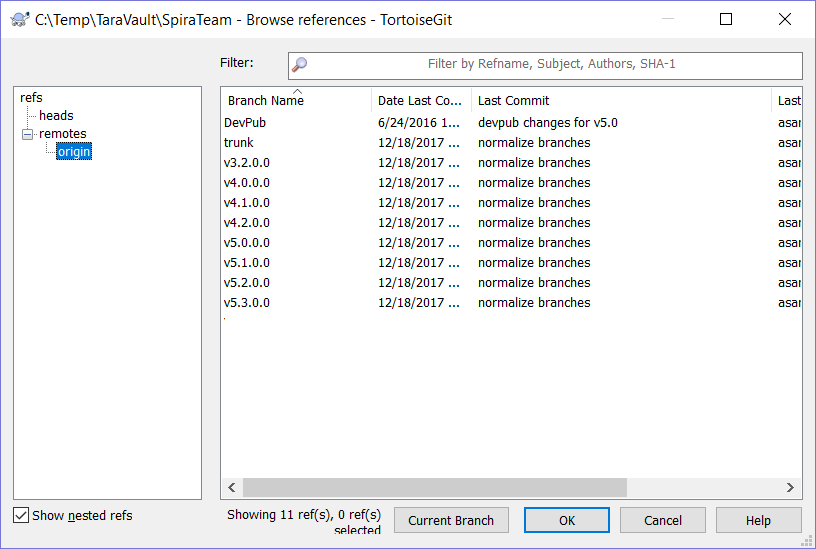
If you click on the "refs" link you will see that there are no local branches in the repository, just the remote origin branches:
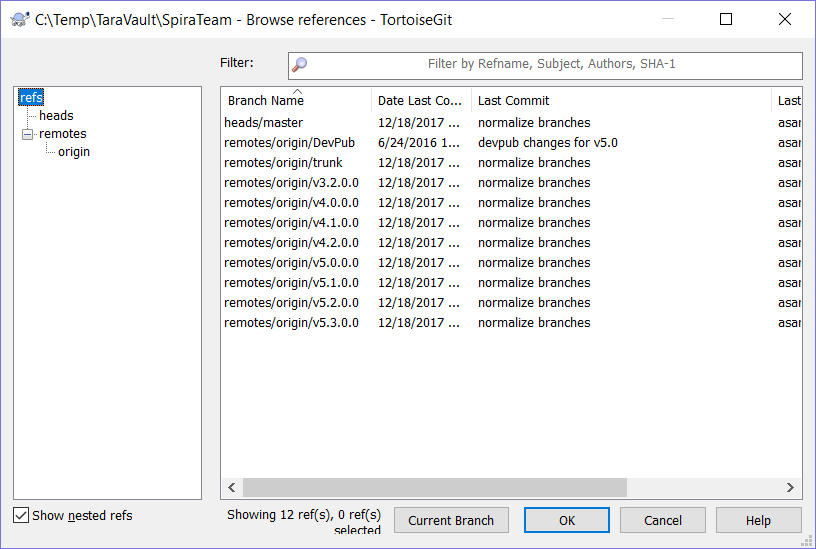
So the next step is to Git checkout each of the remote origin branches, and create a new local Git branch for each one. Using TortoiseGit it looks like the following:
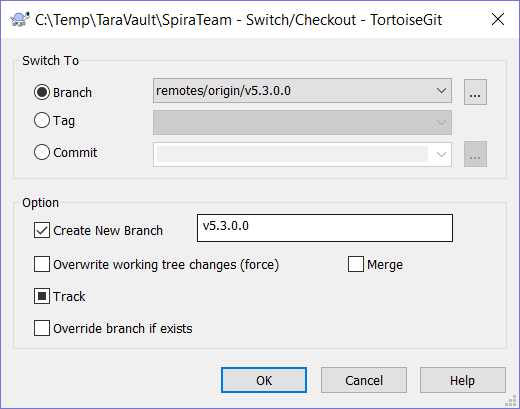
The equivalent command-line option would be:
git checkout -b v5.3.0.0 remotes/origin/v5.3.0.0
Once you have done this for all branches, you will have the following local and remote (origin) branches visible:
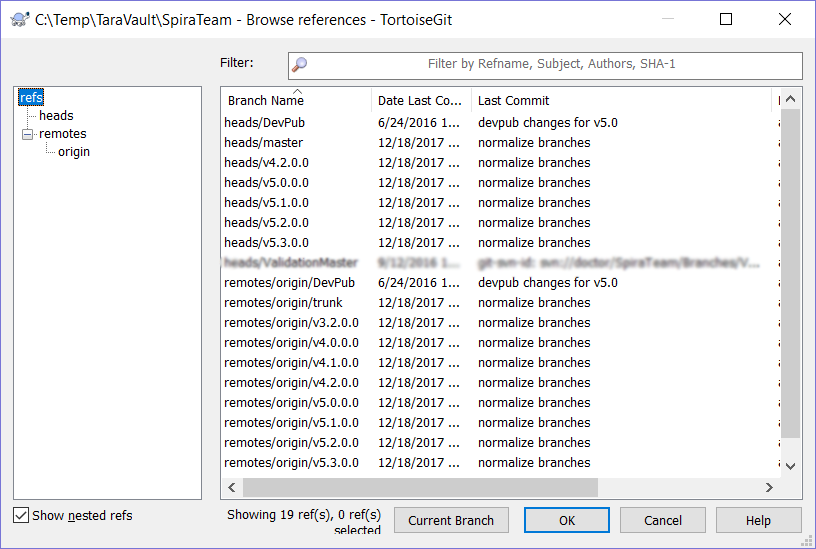
You now have all of the former SVN branches (plus Trunk = master) available as local branches on your machine.
4. Initialize the Remote Repository
Now you need to initialize the remote repository that will be used to store the remote branches from the different committers. This process is similar across Git hosting services (GitHub, GitLab, etc). The key is to know the remote Git Clone URL and authentication.
5. Push the Local Branches to the Remote Repository
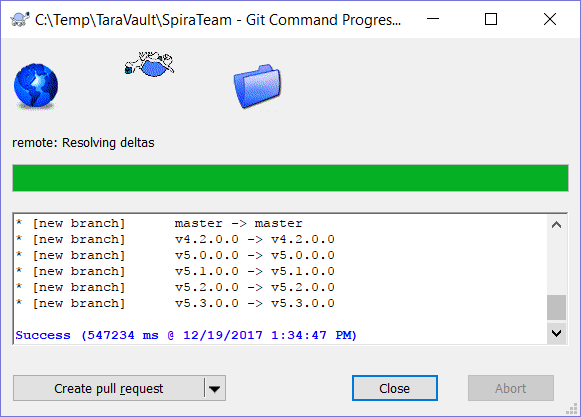
Now that you have the remote repository ready, use the Git Push option (either command-line or via. GUI tools such as TortoiseGit) to push all the local branches to your remote repository:
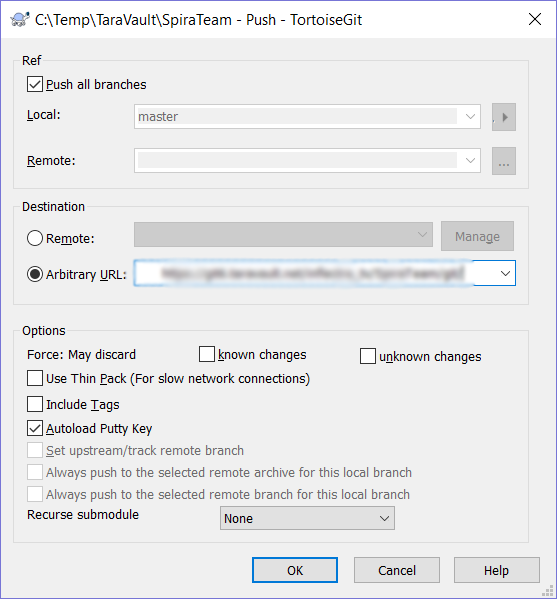
You should choose the option "Arbitary URL" and enter in the Git Clone URL.
Once the PUSH is successful, you will see the branches listed as pushed to the remote repository.
Congratulations, you have now successfully migrated your repository and its full commit/branch history to Git.